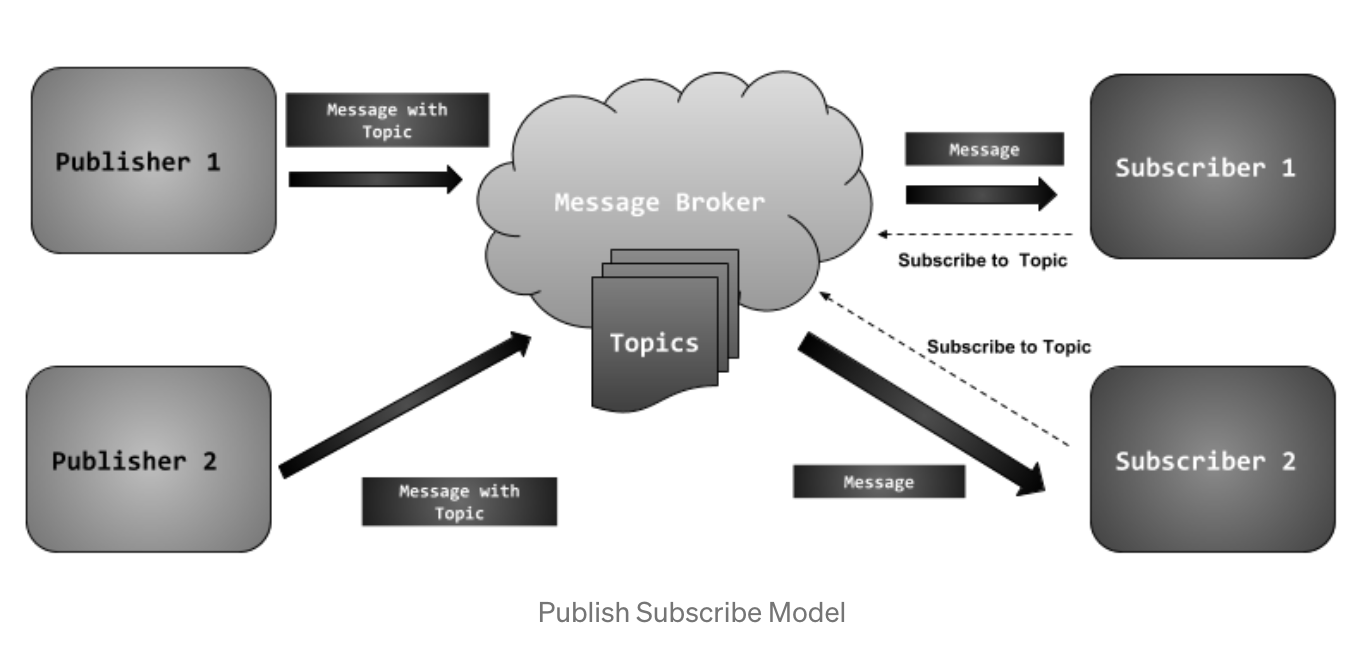
During the Networking and Communications week of the Fab Academy, Oscar set up an MQTT broker on his Raspberry Pi and got all peers to exchange data from their own projects. MQTT is a machine-to-machine connectivity protocol following a publish/subscribe architecture:
I decided to work on the whole setup myself and test whether I could apply MQTT with my custom McDuino ESP32 Board. It is not mandatory to test my board with other boards, hence, my plan was to simply send messages from my sensors to my actuators of the same board over MQTT. I added another node to the networking flow, which is a Node-RED dashboard.
Mosquitto broker
An MQTT broker is a server that receives all messages from the clients, and then routes the messages to the appropriate destination clients. The broker is responsible for receiving all messages, filtering the messages, determining who subscribed to each message and sending the message to those subscribed clients. Mosquitto is a widely-used MQTT broker. Usually, the MQTT broker will be installed on a Raspberry Pi for security reasons, but I installed it directly to my Macbook because it was more convenient. I didn't have and didn't want to buy a Raspberry Pi.

I followed this instruction to install Mosquitto for macOS. First debugging step: running both Mosquitto and Node-RED and plugging in my custom ESP32 board, I could detect a new connection (Node-RED) and a new client (ESP32 board).
Node-RED dashboard
Node-RED is a popular UI for wiring together IoT devices, APIs, and online services over MQTT. This website contains many advanced guides to Node-RED.
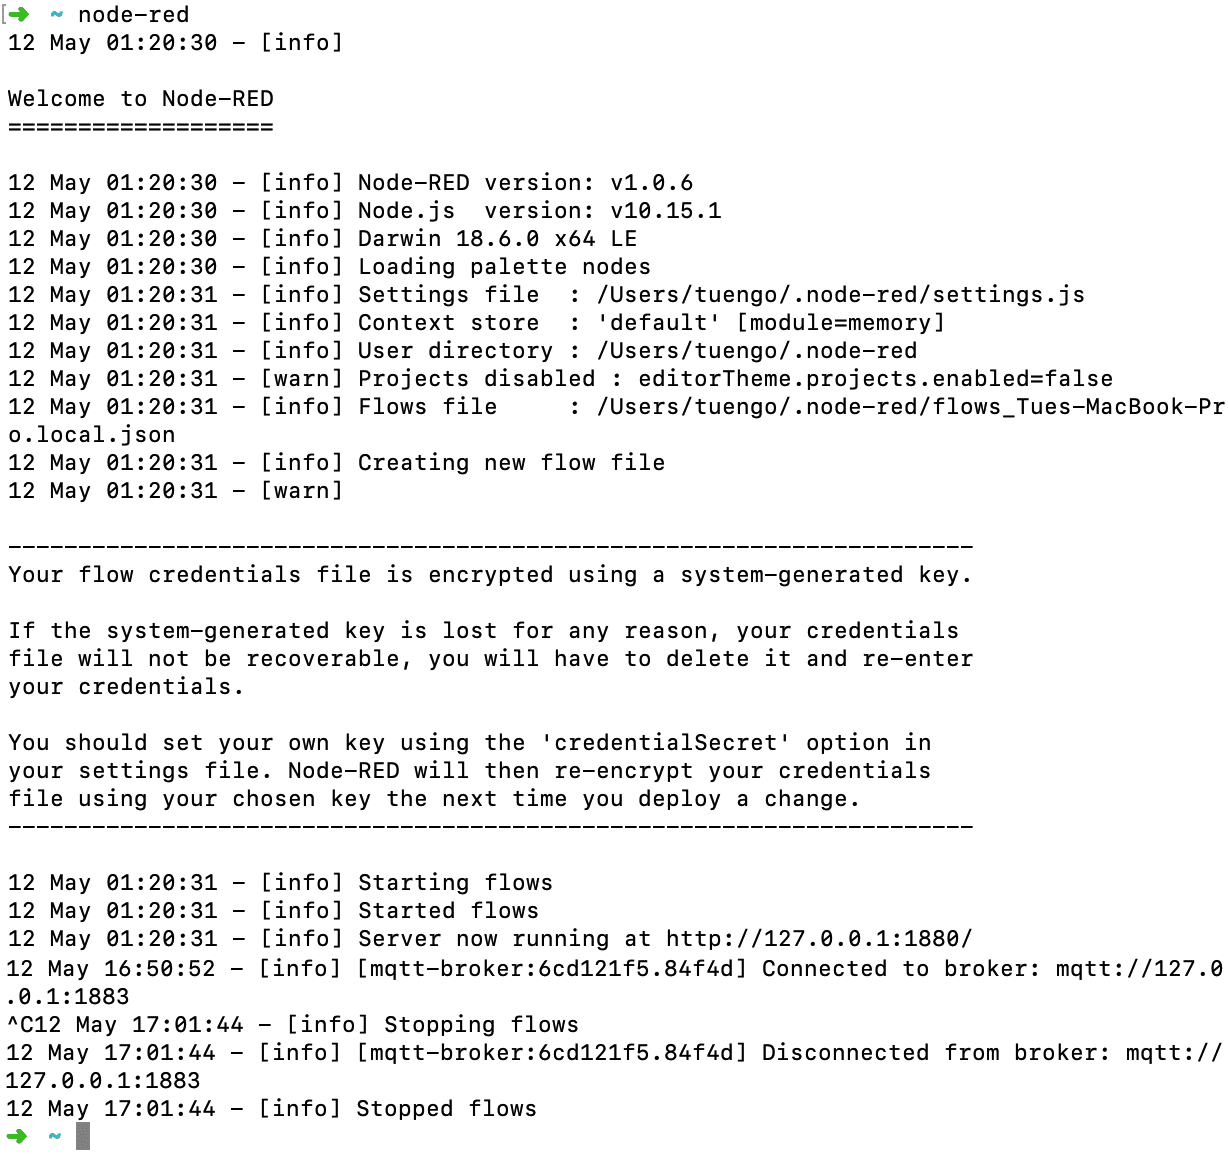
I installed Node-RED locally following this instruction. Second debugging step: Node-RED installed and connected to MQTT broker.
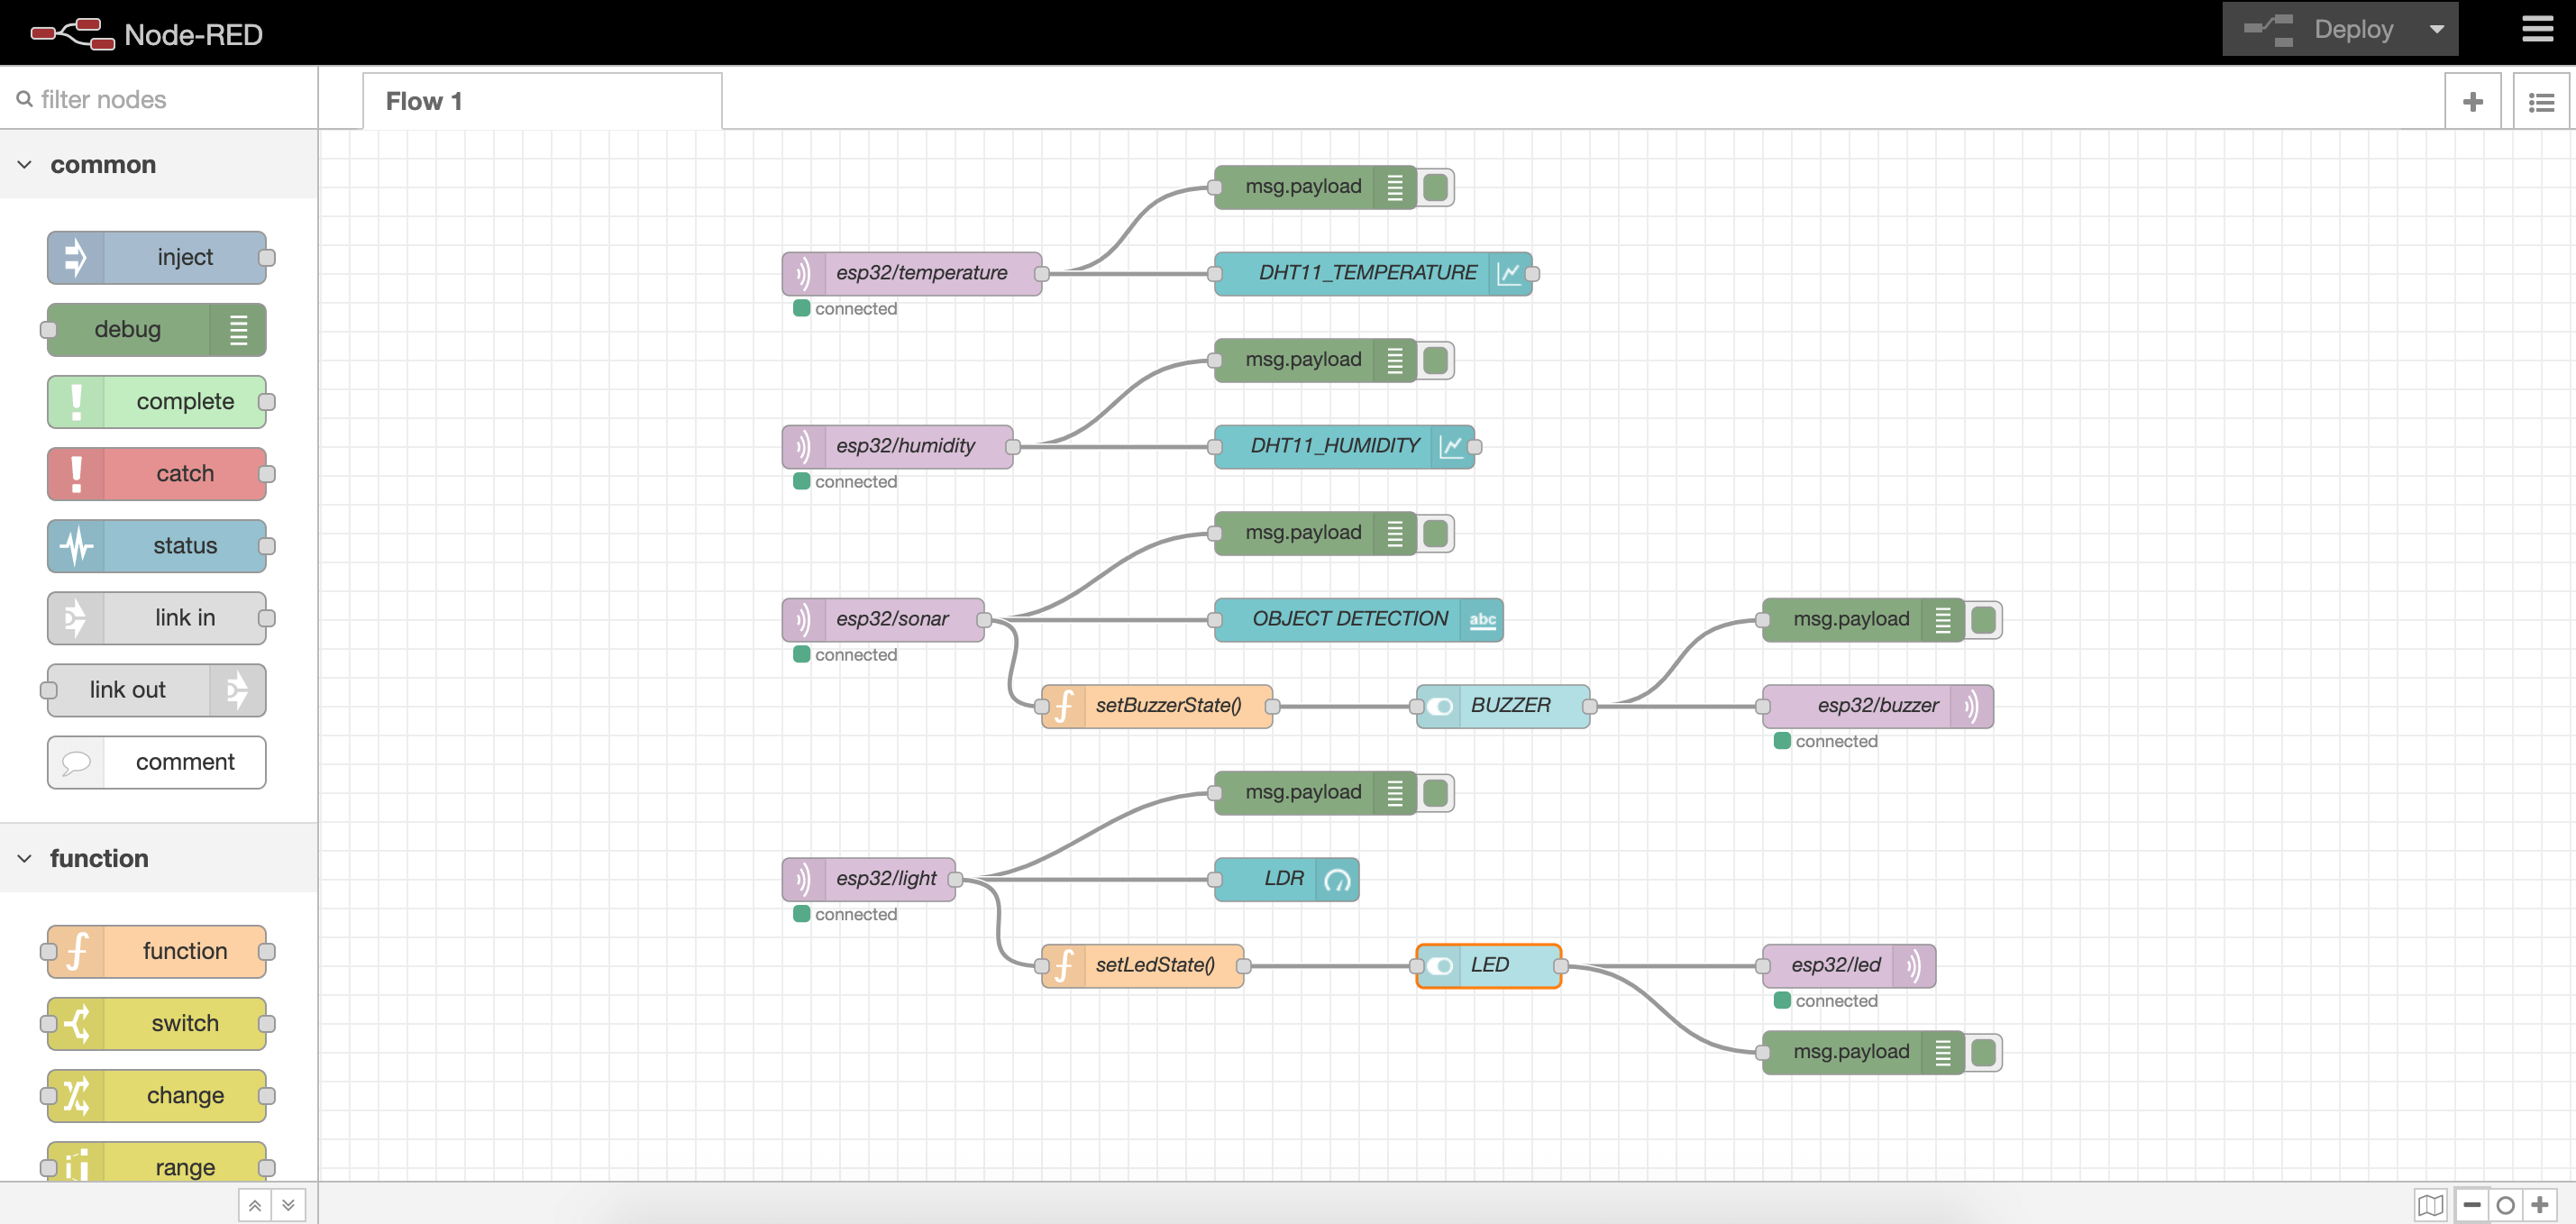
First, I created MQTT nodes for all my inputs (HR-SC04 ultrasonic sensor, DHT11 temperature/humidity sensor and LDR) and outputs (NeoPixel LED strip and active buzzer). A topic is a simple string defined by the user that can have more hierarchy levels, which are separated by a slash. Wildcards can also be used in single level (input/+/temperature will return temperatures of all users) or in multi-level (output/# will return all outputs from all users).

Then, I created some UI dashboard nodes to display my sensors' data as well as sending payloads from the UI switches.
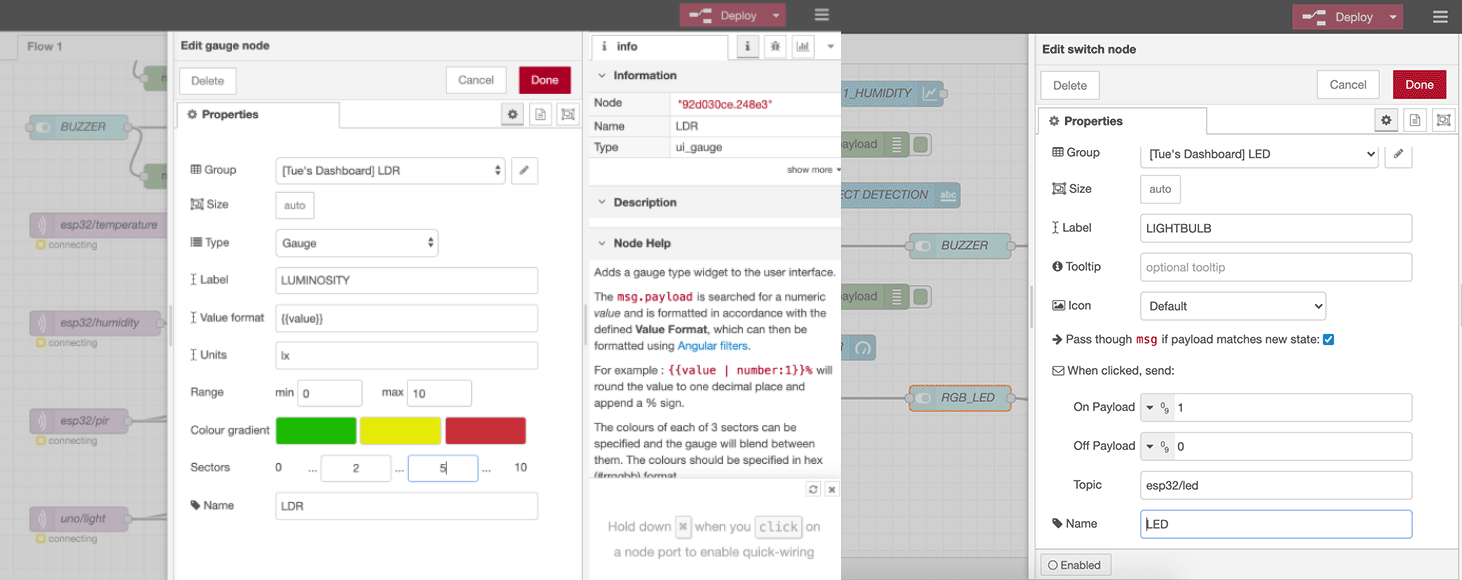
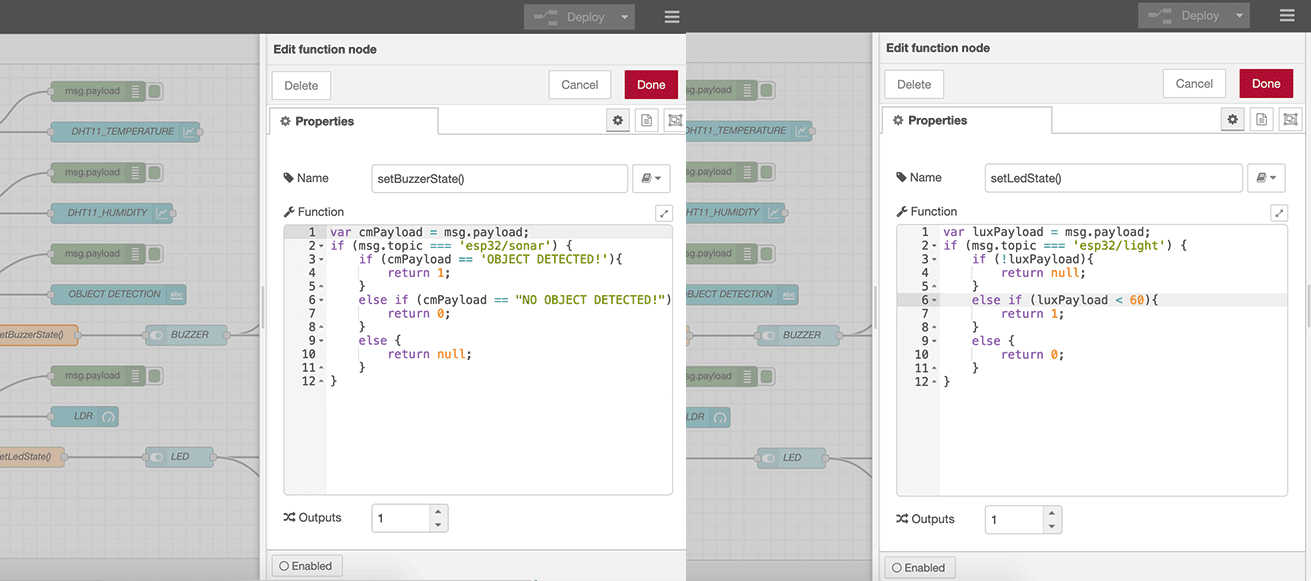
I also created some function nodes, mostly to process the data received from inputs and then to send the related payloads to control the outputs.
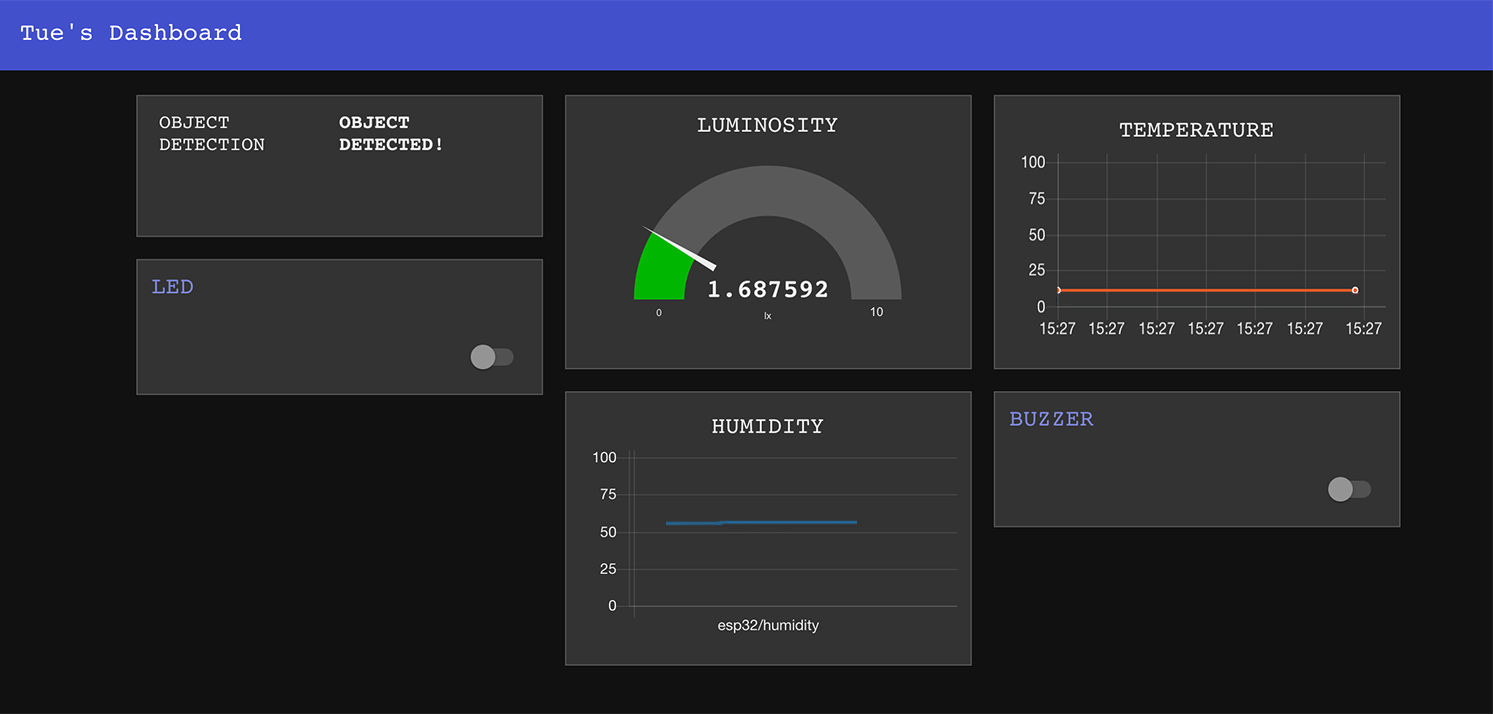
Here we have the final Node-RED flow, ready to be deployed.
Wireless communication
Arduino program
I used PubSubClient library to publish all the sensors' data to Node-RED over MQTT, and also subscribed to the payloads sent by Node-RED. Full API documentation can be found here.
    #include <DHT.h>
    #include <NewPing.h>
    #include <Adafruit_NeoPixel.h>
    #include <WiFi.h>
    #include <PubSubClient.h>

    #define TRIGGER_PIN 32
    #define ECHO_PIN 35
    #define DHT_PIN 33
    #define LDR_PIN 34
    #define BUZZ_PIN 14
    #define RGB_PIN 26

    int ldrValue;
    float tempValue;
    float humValue;
    float distance;
    #define DHTTYPE DHT11
    NewPing sonar(TRIGGER_PIN, ECHO_PIN, 200);
    DHT dht(DHT_PIN, DHTTYPE);
    #define LED_COUNT 10
    Adafruit_NeoPixel strip(LED_COUNT, RGB_PIN, NEO_GRB + NEO_KHZ800);

    unsigned long now = millis();
    unsigned long lastMeasure = 0;

    const char* ssid = "SSID";
    const char* password = "PASSWORD";
    const char* mqtt_server = "SERVERADDRESS";
    WiFiClient espClient;
    PubSubClient client(espClient);

    void setup() {
        Serial.begin(115200);

        pinMode(BUZZ_PIN, OUTPUT);
        dht.begin();
        strip.begin();
        strip.show();
        strip.setBrightness(150);

        // wifi & mqtt setup
        Serial.println();
        Serial.print("Connecting to ");
        Serial.println(ssid);
        WiFi.begin(ssid, pass);
        WiFi.mode(WIFI_STA);
        while (WiFi.status() != WL_CONNECTED) {
            Serial.print(".");
            delay(500);
        }

        Serial.println("");
        Serial.println("WiFi connected");
        Serial.println("IP address: ");
        Serial.println(WiFi.localIP());

        client.setServer(mqtt_server, 1883);
        client.setCallback(callback);
    }

    void loop() {
        // refresh mqtt subscriptions
        if (!client.connected()) {
            reconnect();
        }
        client.loop();

        // publish every 30 seconds
        now = millis();
        if (now - lastMeasure > 30000) {
            lastMeasure = now;

            // send data of all sensors as characters
            char tempMsg[50];
            snprintf (tempMsg, 50, "%f", readTemp());
            char humMsg[50];
            snprintf (humMsg, 50, "%f", readHum());
            char luxMsg[50];
            snprintf (luxMsg, 50, "%f", readLDR())

            // set the topic to publish
            client.publish("esp32/temperature", tempMsg);
            client.publish("esp32/humidity", humMsg);
            client.publish("esp32/light", luxMsg);

            if (readDistance() <= 8) {
                client.publish("esp32/sonar", "OBJECT DETECTED!");
            } else {
                client.publish("esp32/sonar", "NO OBJECT DETECTED!");
            }
        }
    }

    void callback(char* topic, byte* payload, unsigned int length) {
        Serial.print("Message arrived on topic: ");
        Serial.print(topic);
        Serial.print(". Message: ");
        String messageTemp;

        // check payload from MQTT
        for (int i = 0; i < length; i++) {
            Serial.print((char)payload[i]);
            messageTemp += (char)payload[i];
        }
        Serial.println();

        // use received data to turn LED and buzzer on
        if (topic == "esp32/led") {
            if (messageTemp == "1") {
            blinkWhite();
            }
        }
        if (topic == "esp32/buzzer") {
            if (messageTemp == "1") {
            buzz();
            }
        }
        Serial.println();
    }

    // subscribe to topics
    void reconnect() {
        while (!client.connected()) {
            Serial.print("Attempting MQTT connection...");
            String clientId = "ESP32Client-";
            clientId += String(random(0xffff), HEX);

            // set the topic to subscribe
            if (client.connect(clientId.c_str())) {
                Serial.println("connected");
                client.subscribe("esp32/led");
                client.subscribe("esp32/buzzer");
            } else {
                Serial.print("failed, rc=");
                Serial.print(client.state());
                Serial.println(" try again in 5 seconds");
                delay(5000);
            }
        }
    }

    int readLDR() {
        delay(500);
        ldrValue = analogRead(LDR_PIN);
        return ldrValue;
    }

    int readTemp() {
        delay(500);
        tempValue = dht.readTemperature();
        return tempValue;
    }

    int readHum() {
        delay(500);
        humValue = dht.readHumidity();
        return humValue;
    }

    int readDistance() {
        delay(500);
        distance = sonar.ping_cm();
        return distance;
    }

    void buzz() {
        digitalWrite(BUZZ_PIN, HIGH);
        delay(500);
        digitalWrite(BUZZ_PIN, LOW);
        delay(500);
    }

    void blinkWhite() {
        colorWipe(strip.Color(255, 255, 255), 500);
    }

    void colorWipe(uint32_t color, int wait) {
        for(int i = 0; i < strip.numPixels(); i++) {
            strip.setPixelColor(i, color);
            strip.show();
            delay(wait);
        }
    }
Wired communication
If we don’t have a wifi-capable module but a normal Arduino board, we can use paho-mqtt - a Python MQTT client as a mediator that can exchange data over serial port with the MCU as well as exchange MQTT messages with Mosquitto broker.
Python program
In this case, I wired a buzzer and an LDR to an Arduino Uno. LDR data received over serial port will be used to control the NeoPixel strip of the custom ESP32 board. The Python program will also receive MQTT messages to control the buzzer and send it to the Arduino board. The Arduino program is not provided here.
    import paho.mqtt.client as mqtt
    import time
    import serial

    mqtt_broker = "SERVERADDRESS"
    mqtt_user = "MQTTUSER"
    mqtt_pass = "MQTTPASS"
    broker_port = 1883

    PORT = "SERIALPORT"
    BAUDRATE = 115200

    ser = serial.Serial(PORT, BAUDRATE)

    def on_connect(client, userdata, flags, rc):
        print(f"Connected With Result Code: {rc}")

    def on_message_buzzer(client, userdata, message):
        temp_message = message.payload.decode() + "\n"
        ser.write(temp_message.encode())

    def on_log(client, obj, level, string):
        print(string)

    def read_ldr():
        ldr_reading = str(ser.readline().replace("\n", ""))
        return ldr_reading

    # connect to MQTT
    client = mqtt.Client(clean_session = True)
    client.on_connect = on_connect
    client.on_message = on_message_buzzer
    client.on_log = on_log
    client.username_pw_set(username = mqtt_user, password = mqtt_pass)
    client.connect(mqtt_broker, broker_port)

    # subscribe to topics
    client.subscribe("uno/buzzer", qos = 1)
    client.message_callback_add("uno/buzzer", on_message_buzzer)

    # start looping (non-blocking)
    client.loop_start()

    while True:
        # read sensor data
        ldr_reading = read_ldr()

        # publish data to topics
        client.publish(topic = "uno/light", payload = ldr_reading, qos = 1, retain = False)

        if ldr_reading < 400 :
          client.publish(topic = "esp32/led", payload = "1", qos = 1, retain = False)
        else:
          client.publish(topic = "esp32/led", payload = "0", qos = 1, retain = False)

        time.sleep(5)
Demo
